Click on the question to see the answer.
What is the difference between Countermarks and QR Codes?
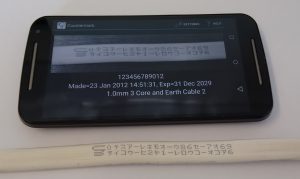
Countermarks are very different to QR codes, the important differences are explained.
- Countermarks are encrypted and inherently secure – all printing is licenced and auditable, Countermarks are read by the Countermark App and server. QR codes are anonymous and insecure – anybody can print a QR code – this will be read automatically by todays phones, sending people to unidentifiable / spoof websites where they can have their money or ID stolen. This is a real risk to users, cases of fraud linked to phones are known as QRishing. The bad guys only need to print a QR code on a sticker and leave it where people will scan it and craft a website that looks like the expected websites. So called ‘Encrypted QR Codes’ are equally vulnerable to this type of attack.
- Countermarks are read and qualified on our servers prior to information being sent to the users’ phone. This added layer enhances the security of the Countermark system. This process also allows us to limit access to individual Countermarks by location, date and the email address of the person reading the Countermark.
- Countermarks directly integrate with existing MRP and existing invoicing systems. Adding the top row of a Countermark to an invoice or delivery note creates a permanent link to the traceability data that allows traceability exercises to be undertaken long after the product has been used.
- Countermarks are based on alphanumeric characters – a scuffed or damaged Countermark can be entered manually. The first 6 digits of a Countermark represents over a billion combinations, the Countermark server will check the list of existing Countermarks as each digit is entered. Reducing the effort needed for manual data entry.
- Using human readable characters allows the use of Continuous Ink Jet (CIJ) printers – these are the most widely used printers in production of consumer goods – typically used for “best-by” dates and lot codes. QR codes need specialist printers that create solid black and white squares. These printers are expensive and can be difficult to use on high-speed production lines.
- For Countermark, human readability is exactly that, Countermark currently is available in Latin, Cyrillic, Chinese and Japanese fonts, other fonts can be added – ask us for information.
What does “We do not recognise this Countermark” mean?
If you scan a Countermark and get a message showing “We do not recognise this Countermark”, then it means that we were able to read the Countermark, but there was a problem. This could be that we could not find it in our database.
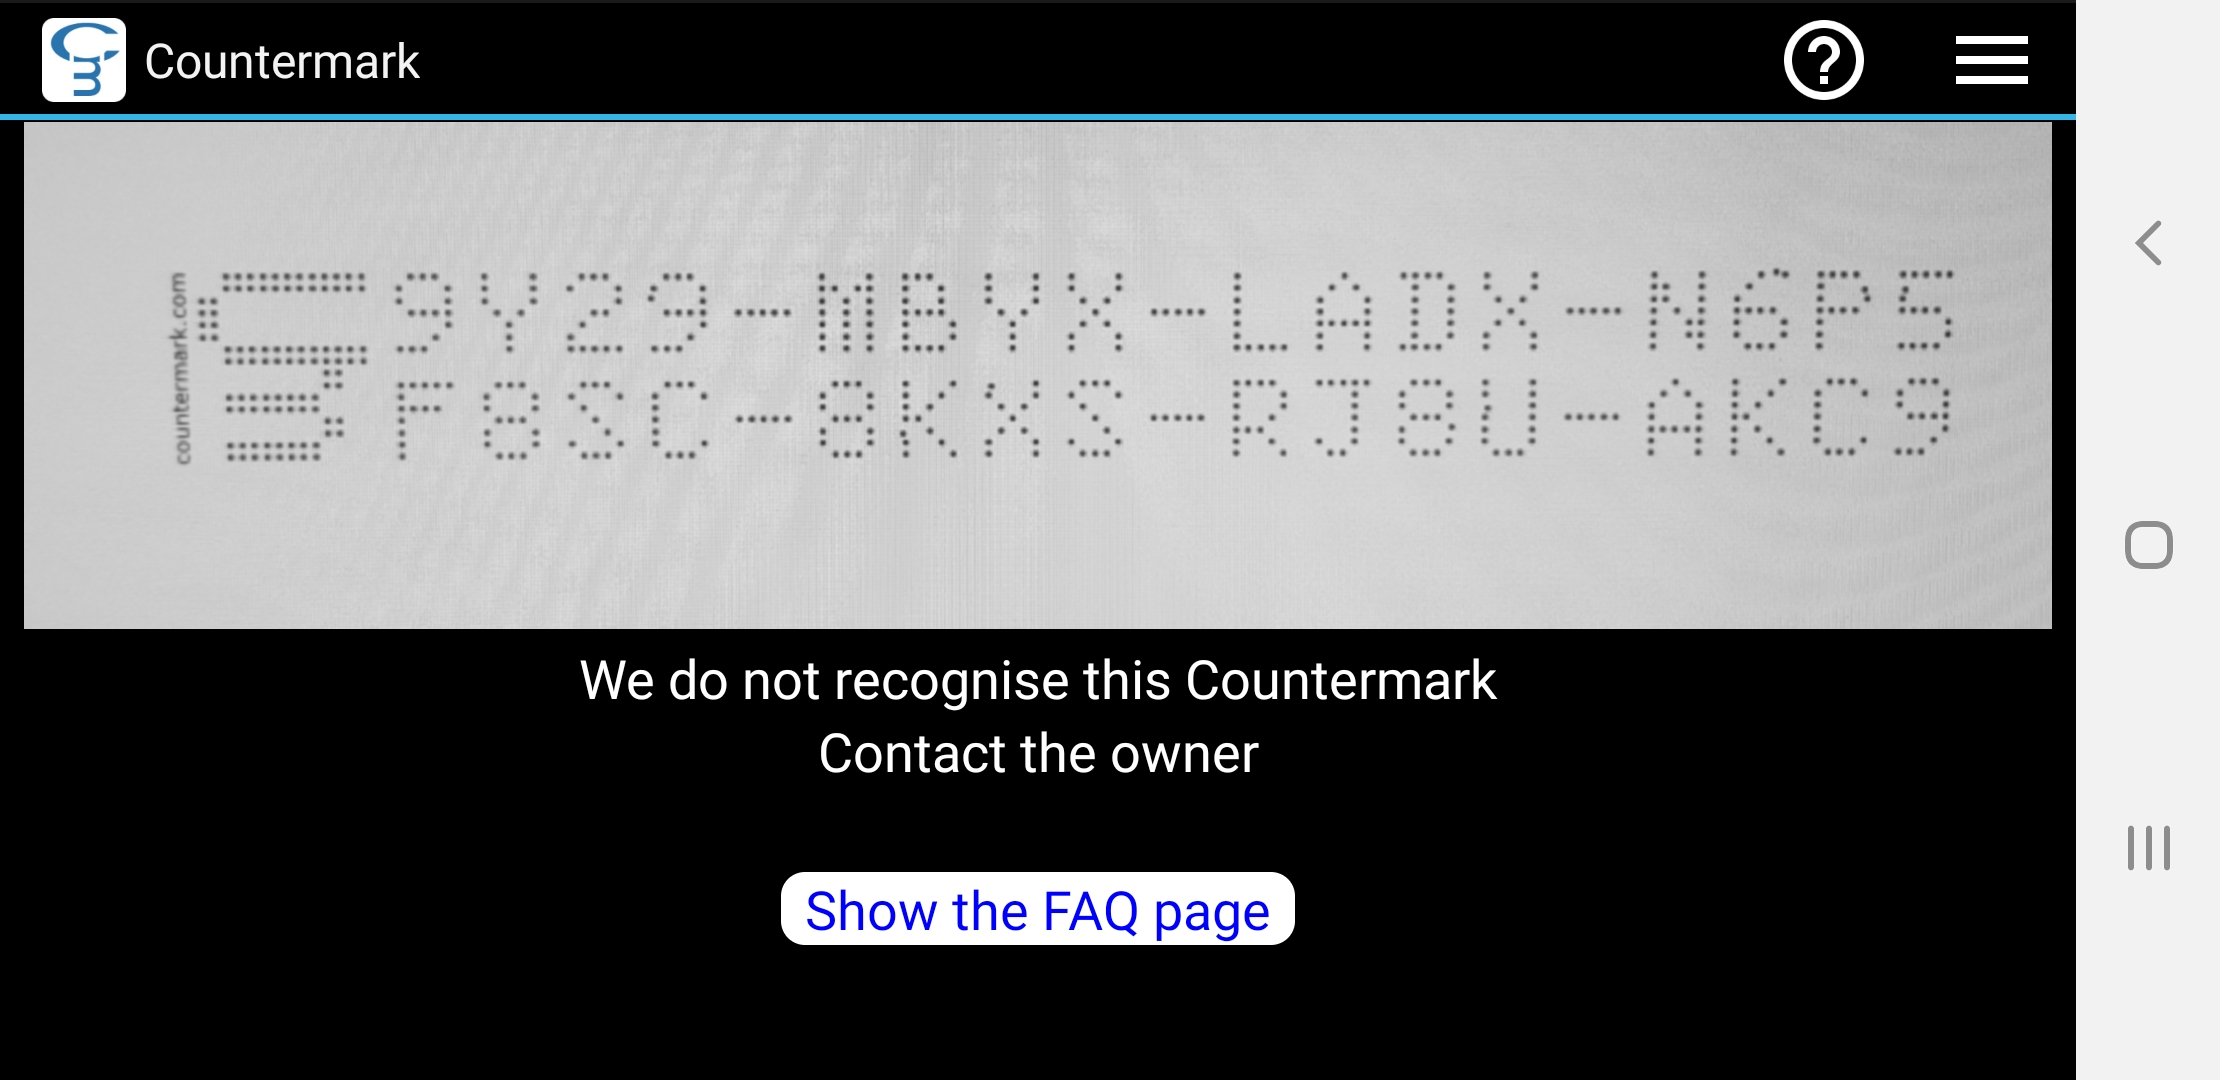
Please contact the owner of the Countermark for assistance and investigation.
What does ‘There was a problem with my Countermark’ mean?
If you scan a Countermark with the phone App and get a response “There was a problem with this Countermark”, it means we had difficulty looking up the details in our database.
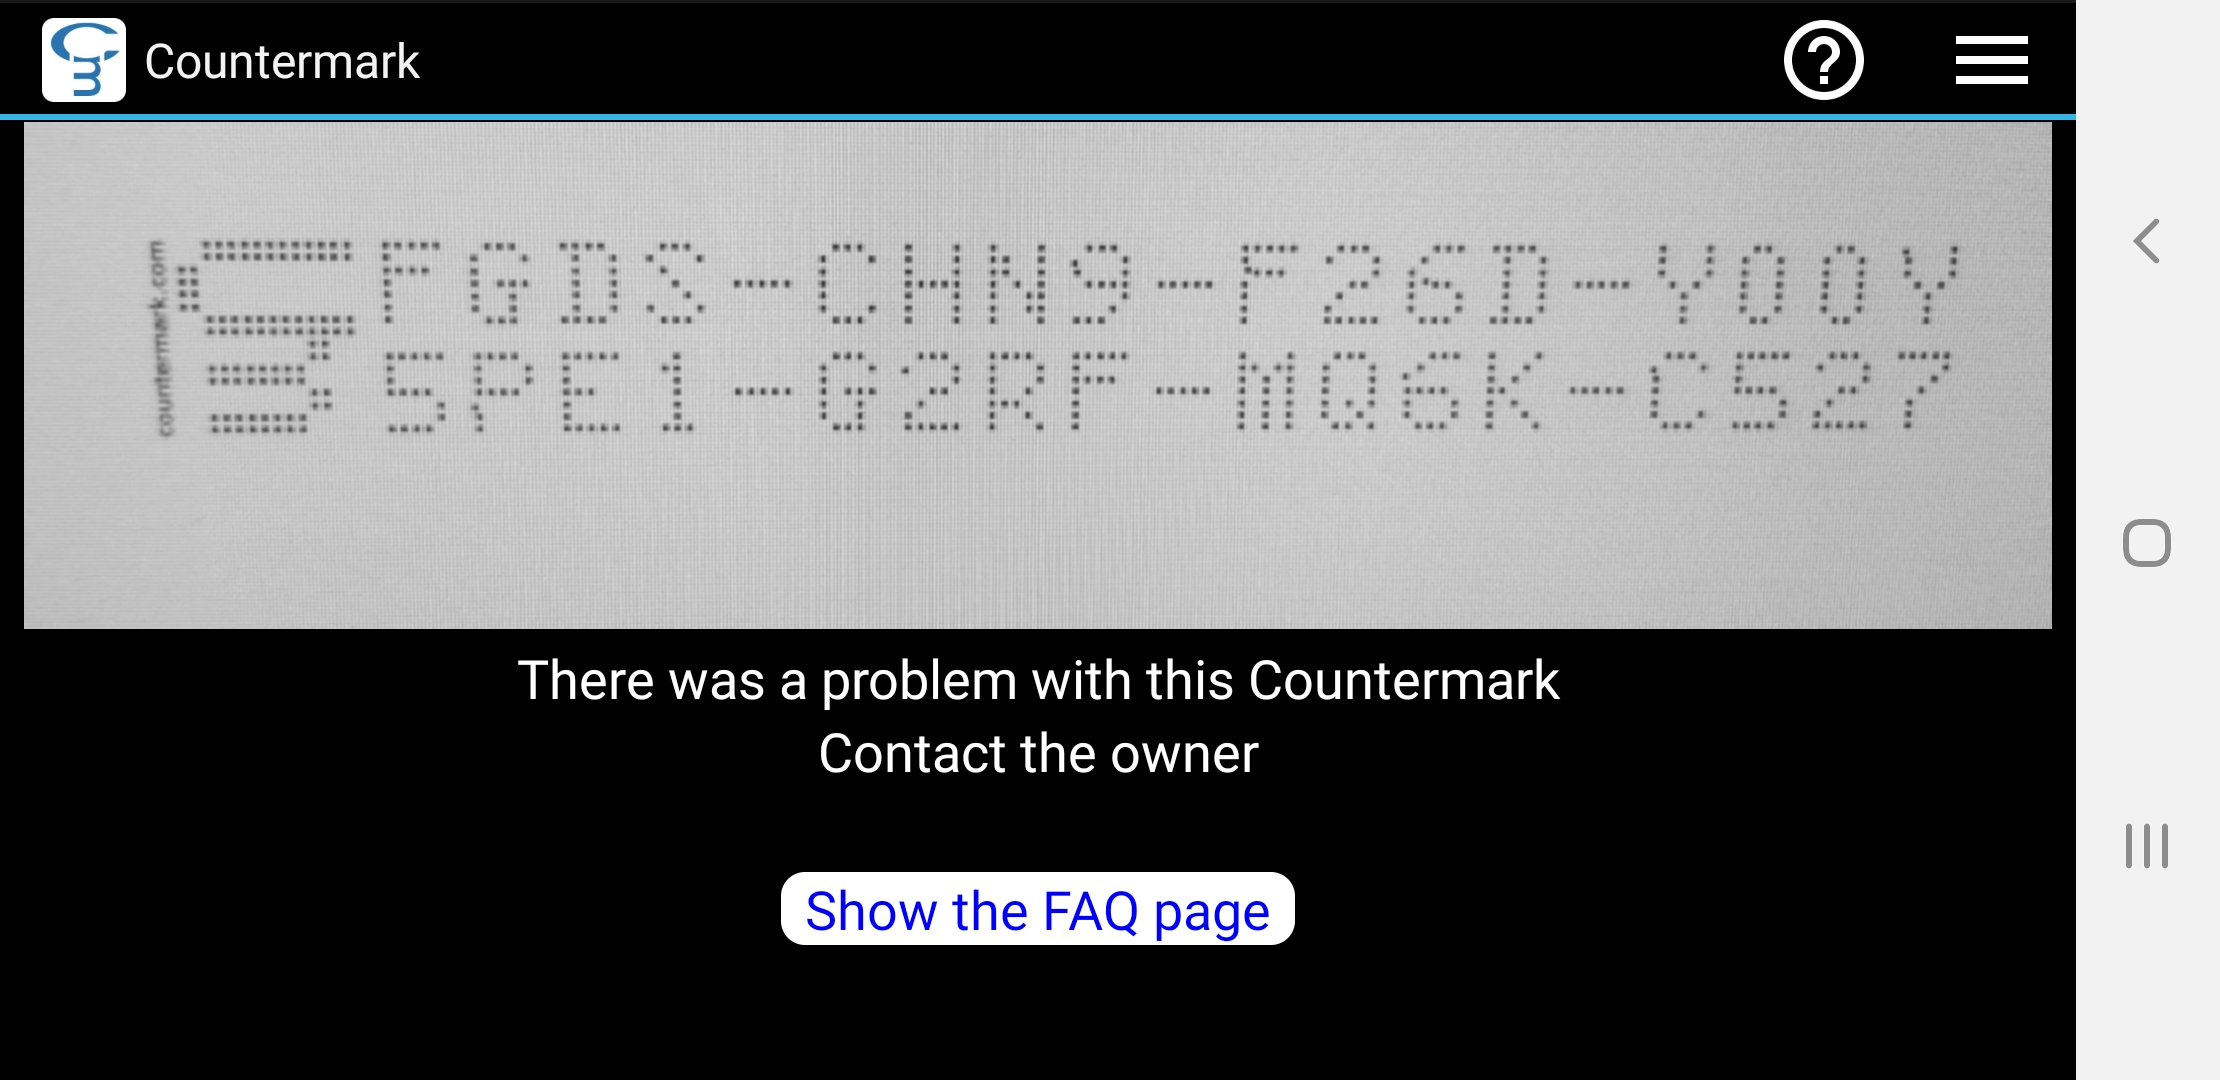
Please contact the owner of the Countermark for assistance and investigation.
Can I still control a Countermark once it has been made?
Countermark Account Holders can change the status of a Countermark until it expires.
Status Types:
- Active status is the usual initial state for Countermarks
- Revoked status implies a short-term temporary interruption
- Suspended status is intended when the interruption is required for a longer period of time
- Cancelled status shows that the Countermark is now closed
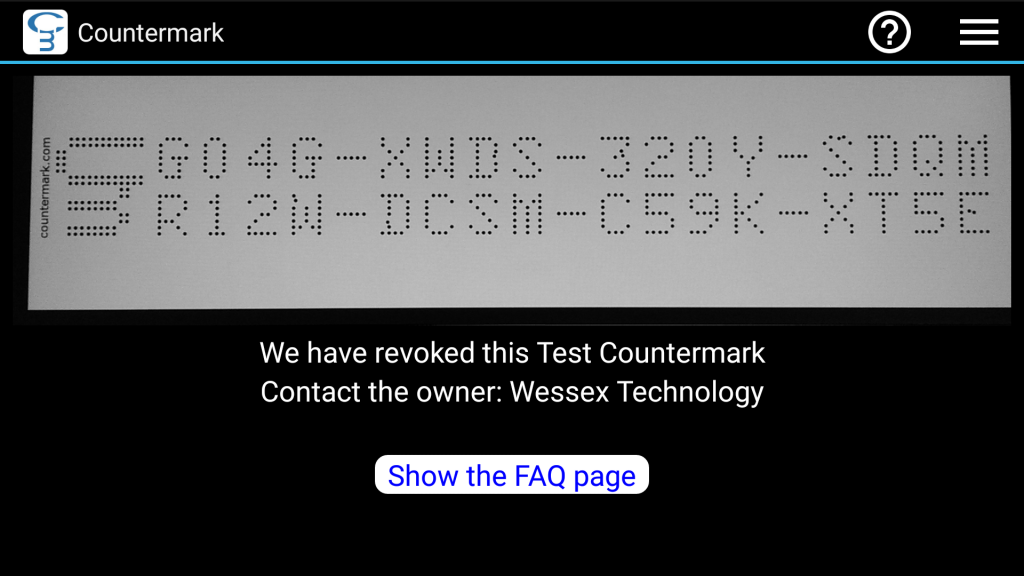
The exact usage of these states is up to the Account Holder to decide and remain in place until changed again. This provides a useful mechanism of controlling access to the Countermark information even after the Countermark has been generated and used in the field for some time.
What’s the best way to convert my Microsoft Word document to PDF?
When converting Microsoft Word documents to PDF, images in the document may not always retain the clarity of the original. The readability of the Countermark image in particular can be affected in this way.
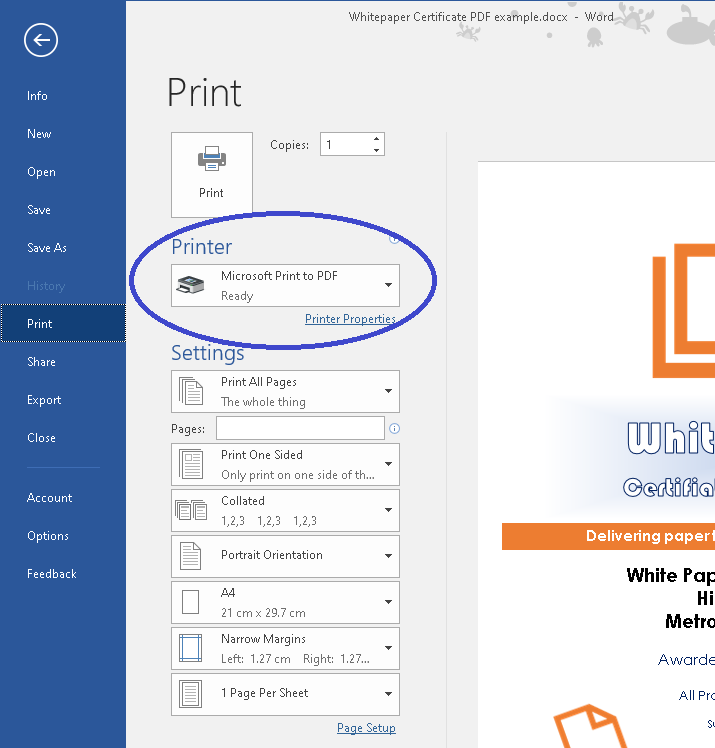
To give the best rendering, click on the File tab in Microsoft Word followed by clicking ‘Print’. Select ‘Microsoft Print to PDF’ from the list of printers.
Press ‘Print’ to create the PDF, and remember the file name and location for use later on.
Other PDF options exist (Save as PDF, Export as PDF), but these try to minimise file size by compressing images. The Microsoft Print to PDF preserves the image quality.
How is Blockchain used on Countermark?
Countermark uses Ethereum Blockchain to provide a secure, unalterable audit of Countermark changes.

No Countermark details are stored in the Blockchain, just a ‘hash’ (essentially a sum of all the data in the Countermark record). This hash value can be recalculated for the Countermark data, and compared with the unalterable Blockchain version to look for any alterations to confirm that the Countermark data is not compromised.
Blockchain in Countermark is available as an option, depending on your requirement.
What are the recommended browser and firewall settings?
The Countermark website needs access to the following related websites to operate, if the web page does not display properly check your firewall settings, the following URL’s need to be accessible
countermark.com
cloudflare.com
googleapis.com
gstatic.com
googletagmanager.com
google-analytics.com
chimpstatic.com
player.vimeo.com
vimeocdn.com
The Countermark Word Add-in needs access to the following related websites to operate, if the Add-in does not work properly check your firewall settings, the following URL’s need to be accessible
Microsoft.com
Microsoftonline.com
Office.com
Office.net
Aspnetcdn.com
Azurewebsites.net
Bootstrapcdn.com
How do I manage Issuers?
An Account Holder has the ability to create a number of Issuer accounts up to the subscription limit. To increase the subscription limit, please contact us.
To access the Manage Issuer(s) page, login to the Countermark website as the Account Holder.
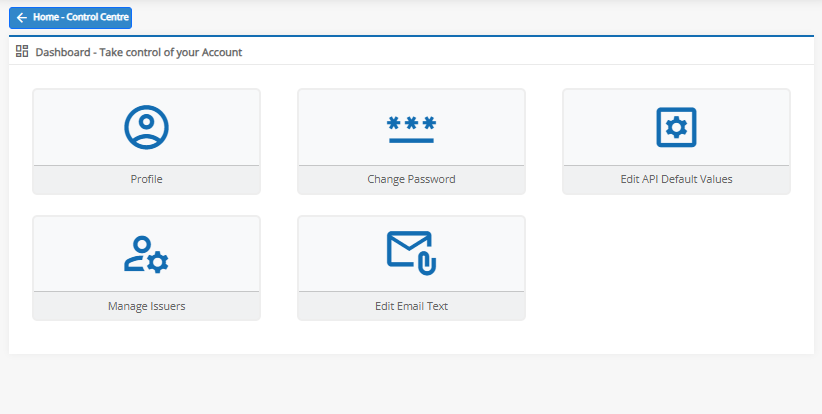
Select Dashboard from the ‘Hello’ menu
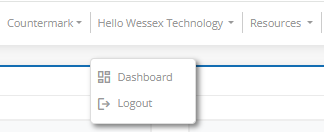
Click on Manage Issuer(s).
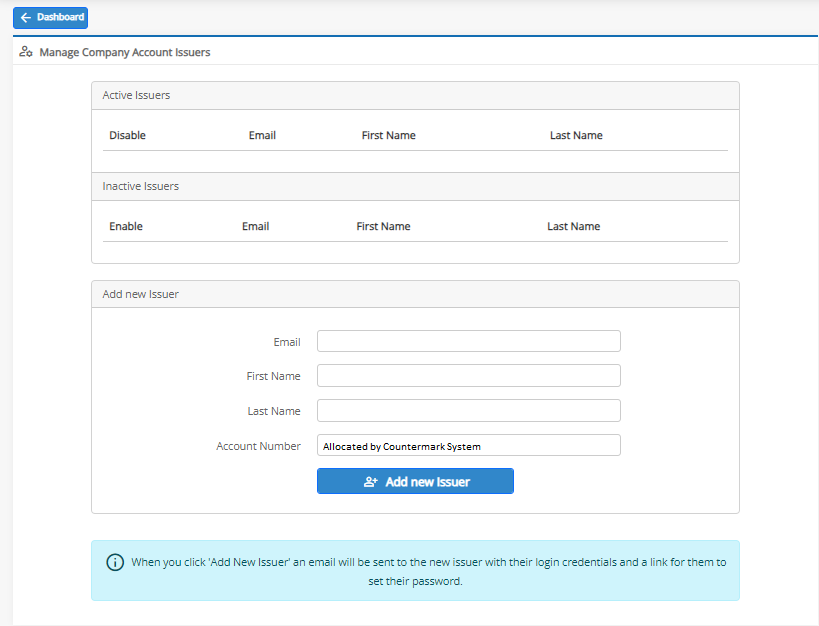
On the Manage Company Account Issuers page, there are sections for Active and Inactive Issuers as well as for adding a New Issuer.
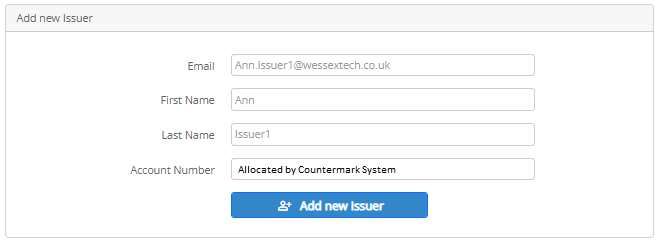
Fill in the details for the New Issuer that you want to add. The account number and email address will be required when they log on.
Press the Add New Issuer button.
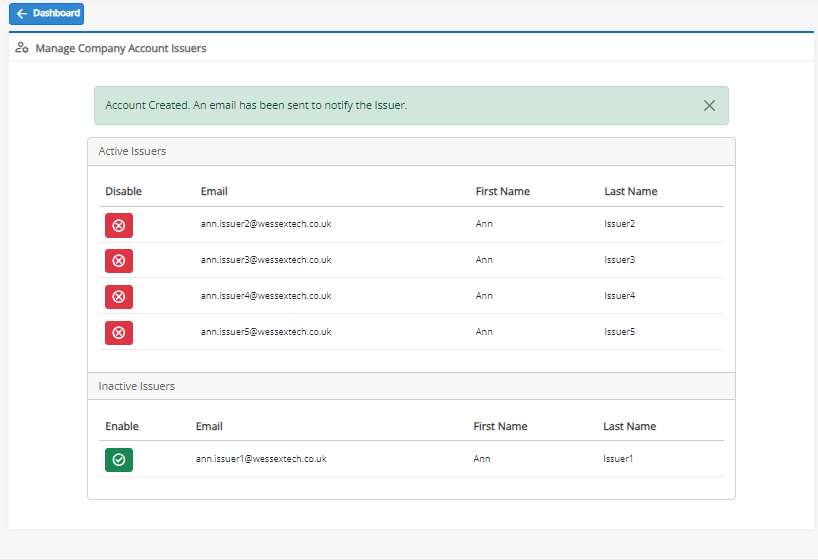
The Account is created and a confirmation banner is shown. The Account Holder can enable or disable Issuers from the Manage Issuer(s) page by pressing the Enable or Disable buttons.
A warning at the top of this page lets the Account Holder know when they have reached their subscription limit for the number of Active Issuers.

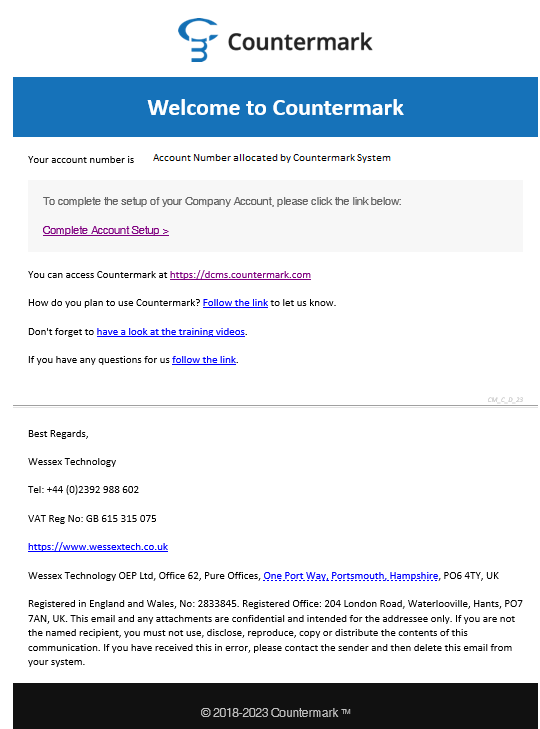
This completes the Account Holders part of creating a new Issuer. An email will be sent to the Issuer containing a link for them to complete the remainder of the account set-up:
Issuer – Account Setup Completion
The Issuer needs to finish the account setup process by click on the “Complete Account Setup” link in the Countermark registration email.
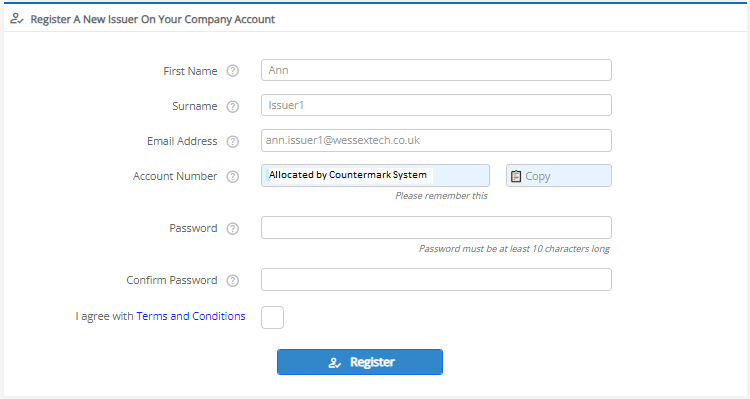
This will take the Issuer to a registration page to confirm their details and enter their own password. The Issuer needs to note the Account Number allocated and the Password submitted. The Terms and Conditions need to be agreed before pressing the Register button, which will complete the registration process.
The Issuer is now able to log in to the website or sign in to the Word Add-in using their Account Number, Email Address and the Password.

How do I use the Countermark Word Add-In?
Once installed, the Countermark Word Add-in is placed on the right hand side of the Home ribbon.

Clicking on the Countermark Word Add-in icon causes it to appear next to your document.
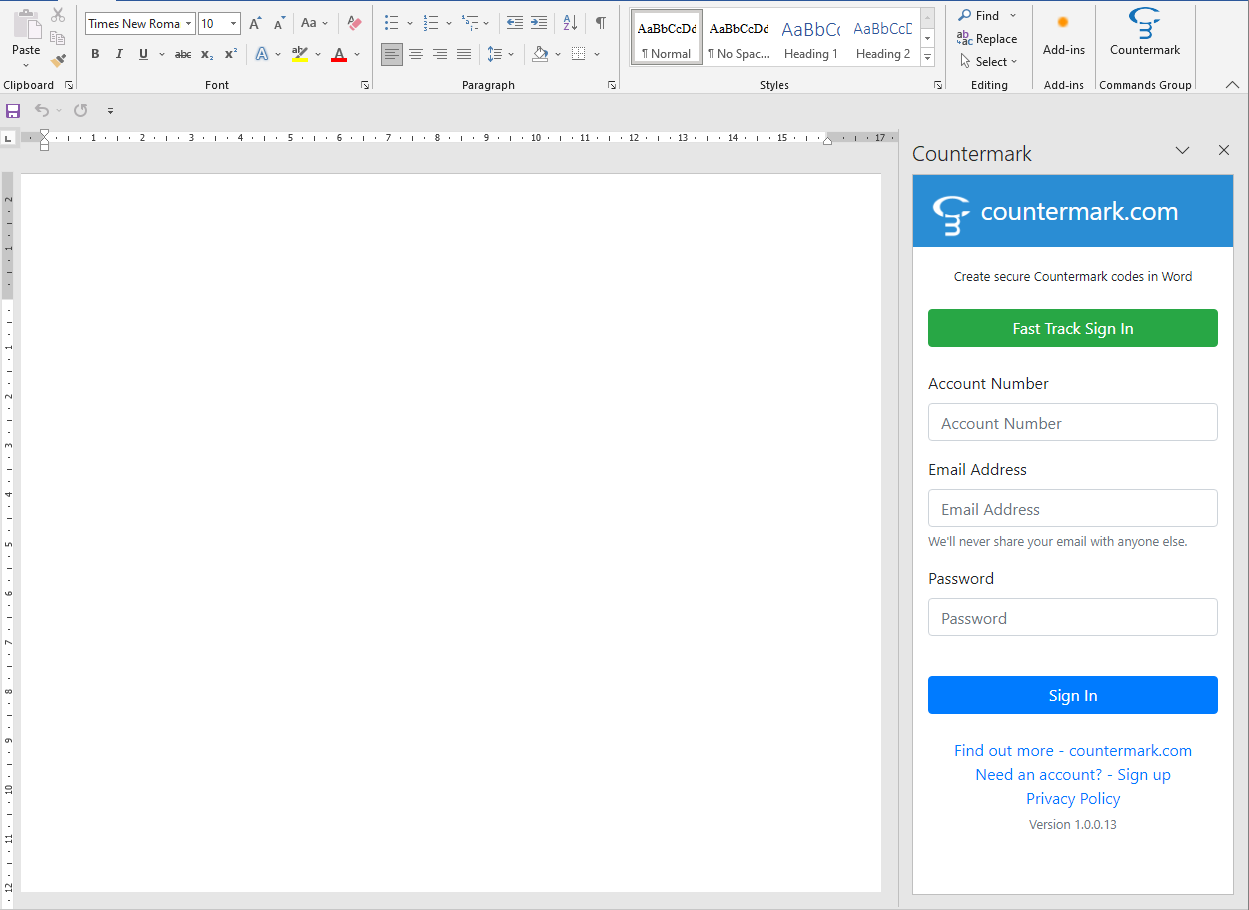
You need to sign in to the Countermark Add-in before it can be used. Enter your Account Number, Email address and Password that were provided by your Countermark Account Holder. This will be the person that set the account up initially. Press the Sign In button.
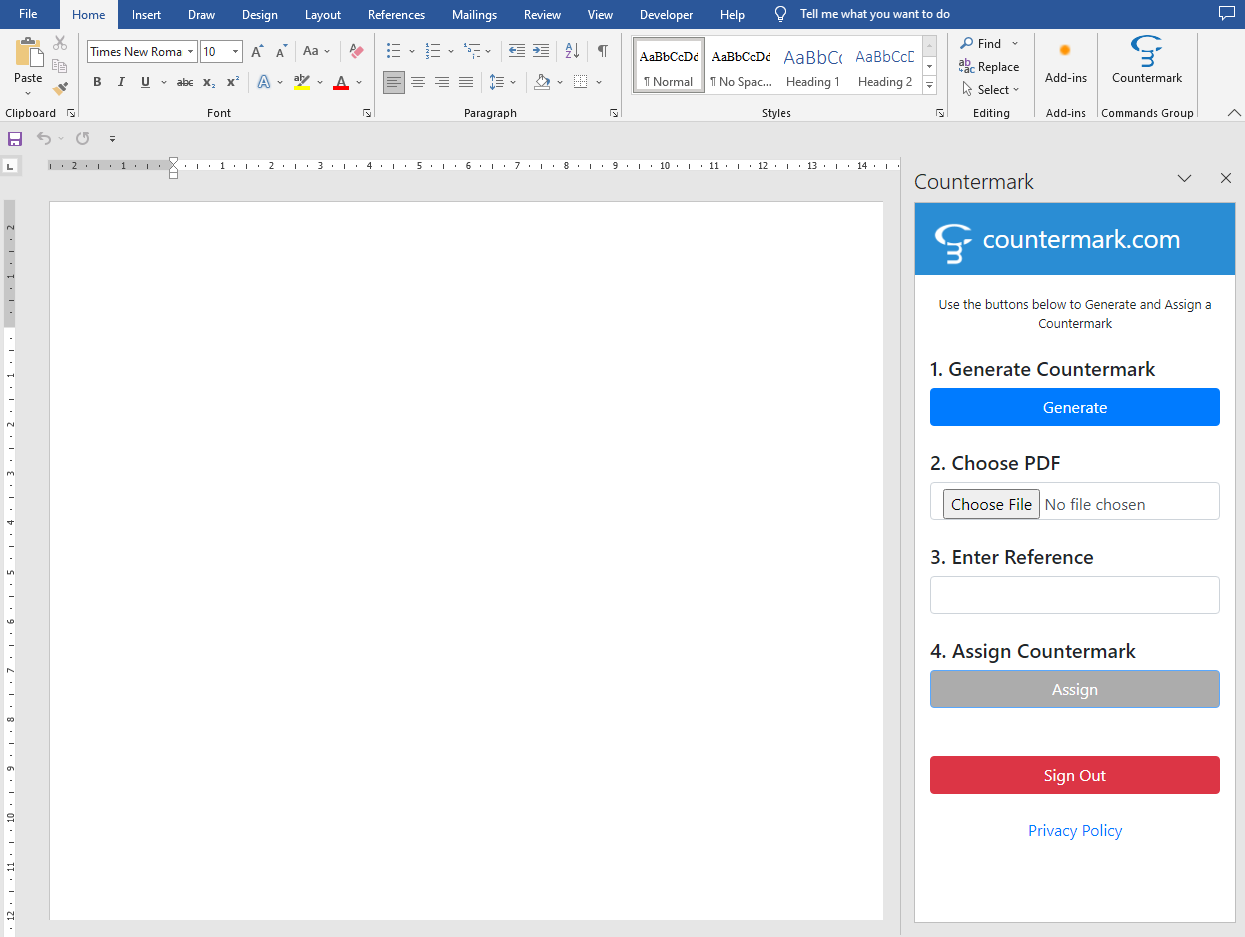
The Add-in now shows the 4 steps required to create a Countermark. In this example the Word Add In API has been set to use PDF attachments.
1. Generate Countermark:
To insert a Countermark, place the curser on the word page where you wish the Countermark to be placed and press the Generate button.
The Countermark appears on screen and can be moved or rotated like any other image. Take care not to change the aspect (width/height) ratio of the Countermark image or apply any other kind of image filtering as this will affect the readability and decoding.
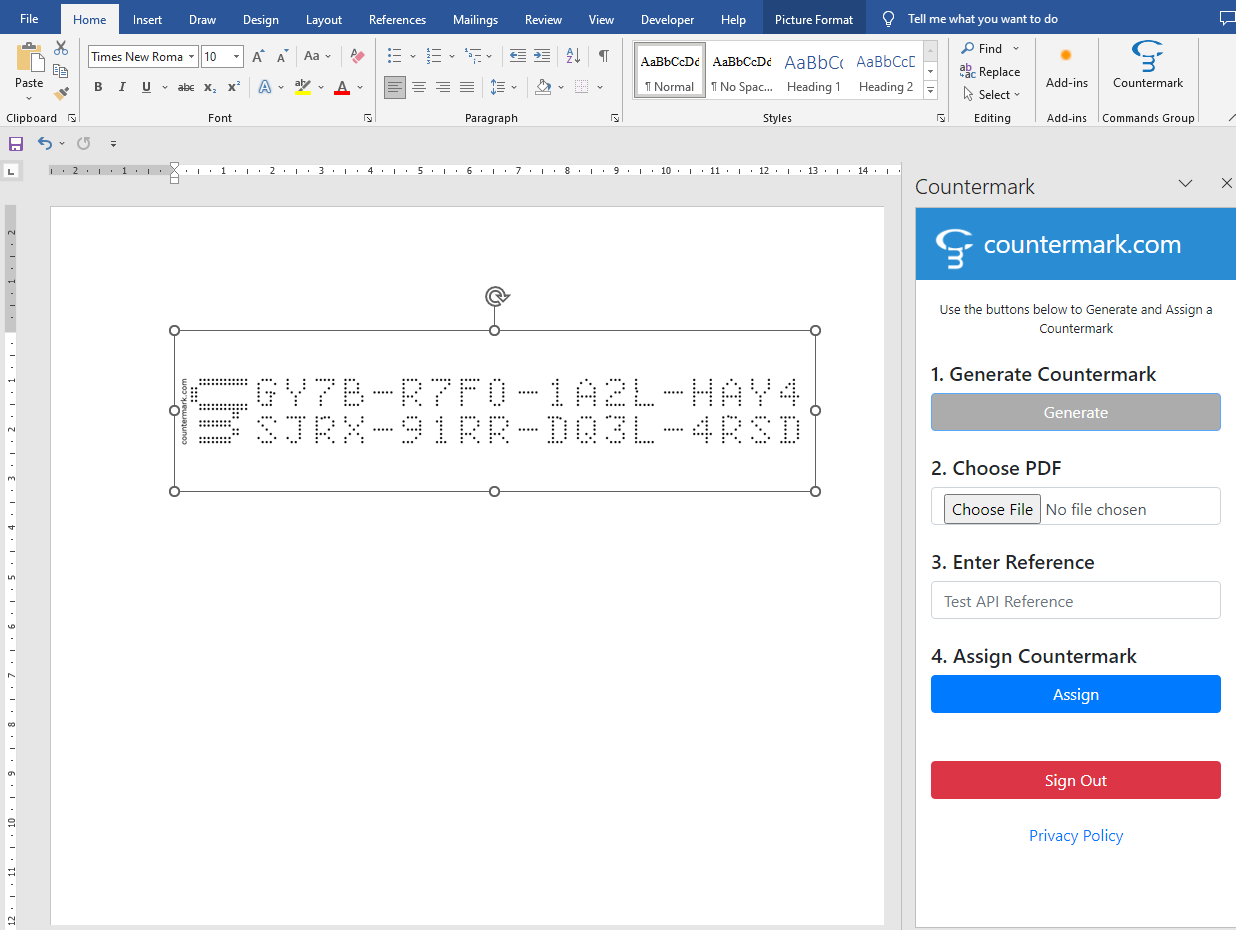
When you have completed your edits to the word document, save the word file then print using ‘Microsoft print to PDF’ option to generate a PDF copy of the document.
2. Choose PDF:
Define the PDF file to be sent to the phone when the Countermark is read. Navigate to the PDF file using the Choose File button and press Open once your PDF file has been located.
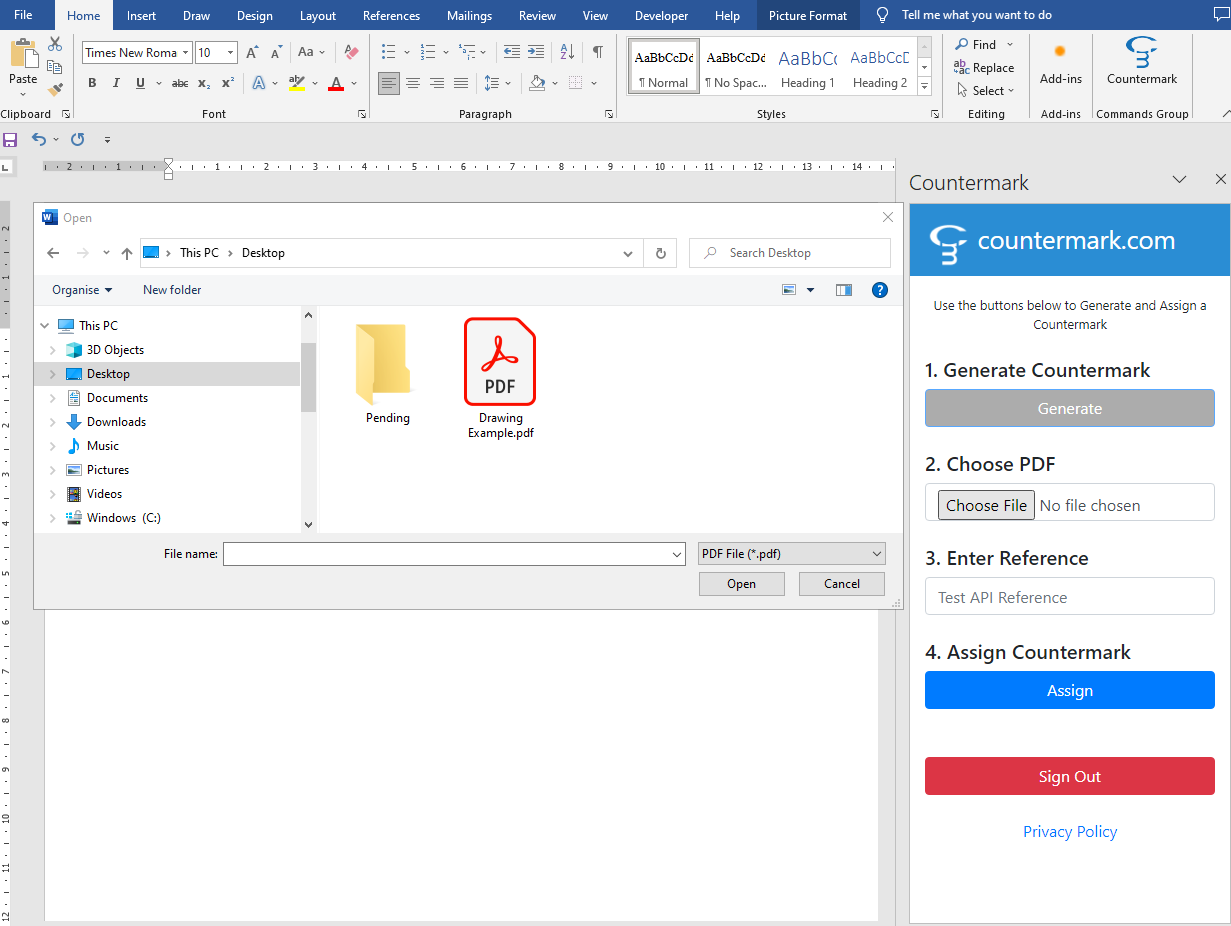
3. Enter Reference:
Update your Reference information in the box provided. This information is visible to the Account Holder and will help keep Countermarks aligned to your organisation’s method of working.
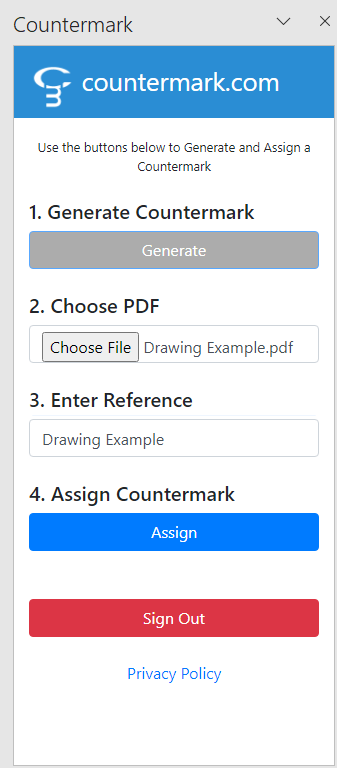
4. Assign Countermark:
Press the Assign button to complete the procedure.
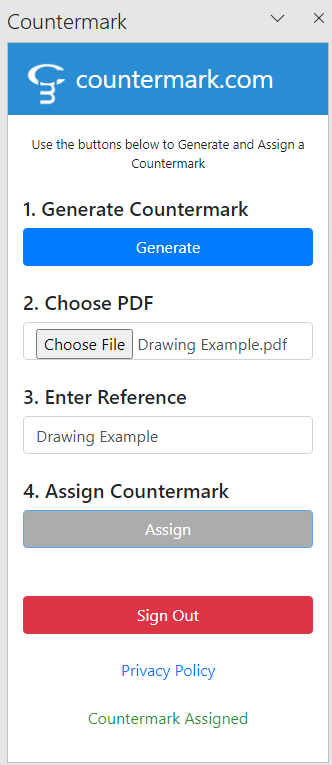
The Countermark in your document is now linked to the file it is representing, and access to this file is now controllable.
Countermarks can also be used to link to a website.
The process is similar, but requires the Account Holder to adjust the API default value for attachment type to use URL instead of PDF. The Issuer can then re-sign into the Word Add-in and then be able to assign a URL to a newly generated Countermark in a Word Document.
The URL https://google.com is shown as an example.
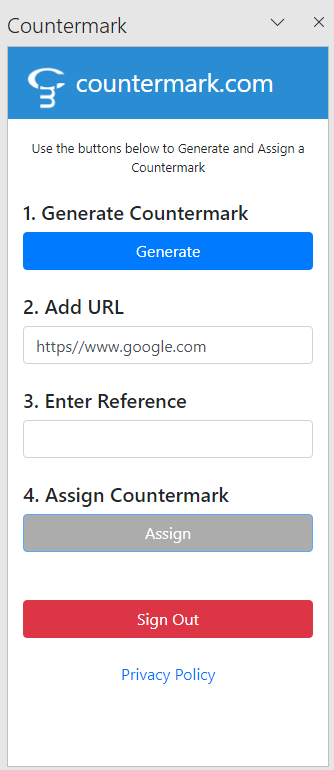
How do I configure the workflow for the Countermark Word Add-in?
To keep the Countermark Word Add-in interface straightforward, some options are chosen beforehand by the Account Holder.
Login to the Countermark website as the Account Holder and select Dashboard from the ‘Hello’ menu
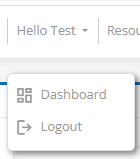
Select the Edit API Default Values option.

The default settings required to use the Countermark Word Add-in are entered here.
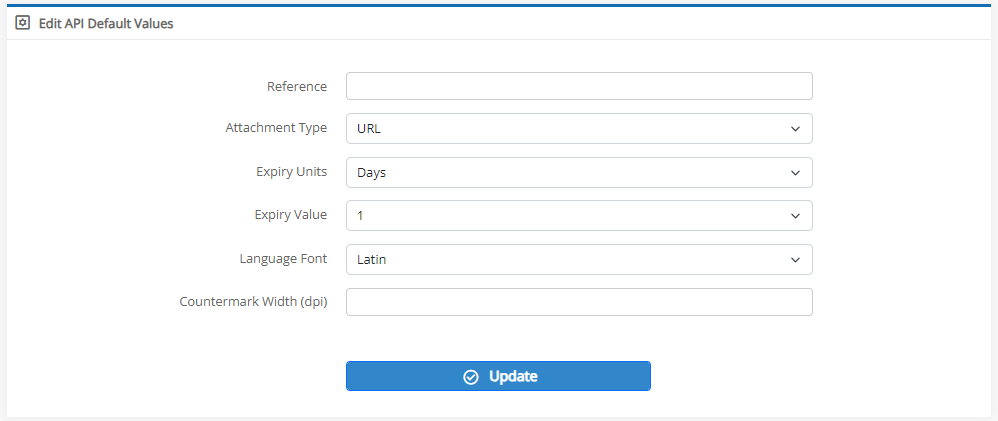
Reference
Optional text that is used to help you identify Countermarks. It could be used as a product identifier, a batch number or anything else you require, this will be displayed in the Reference field of the Countermark Add-In and can be used to search Countermark logs.
Attachment Type
Set to either a PDF file or URL website link for different usage scenarios.
- PDF allows the PDF selected by the Word Add-In to be sent to the phone when the Countermark is read.
- URL causes a web browser on the phone to be opened on the URL selected when the Countermark is read.
Expiry Units
Select the units (Days / Weeks / Months / Years) to determine when each Countermark will expire.
Expiry Value
Select the number of Days / Weeks / Months / Years after which the Countermark will expire. Range 1 to 60 (except Years, 1 to 19).
Language Font
Choose the font to be used in the Countermark, this can be Latin, Cyrillic, Katakana or Chinese. English is written in Latin Font.
Countermark Width (dpi)
Adjust the width of the Countermark image (dots-per-inch) when inserted into a Word document using the Word Addin.
Press the Update button when done.
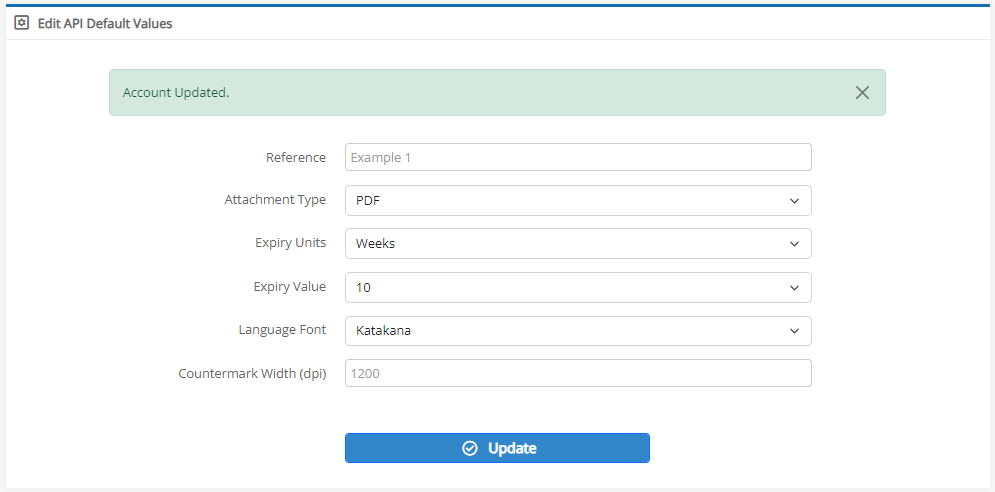
The Countermark Word Add-in Issuer will now be able to generate the type of Countermarks that have been set by the Account Holder.
What does the Countermark Word Add-in do?
An add-in is available to simplify the adding of Countermarks to Microsoft Word documents.

Countermarks can be generated instantly and are automatically inserted as an image in your document.
To install the Countermark Word Add-in visit the Microsoft Office Add-In Store and search for ‘Countermark’
Settings are managed in advance by an Account Holder so that the Issuer can concentrate on the Word document. To use the Countermark Word Add-in both an Account Holder and an Issuer are required.


The Account Holder is able to create Issuers, set workflow defaults and is responsible for payments. The Countermark website allows Account Holders to manage these resources effectively. The Account Holder can also act as an Issuer.

Issuers are able to Generate and Assign Countermarks using the Countermark Word Add-in or through the Countermark website.
To become an Account Holder and start working with the Countermark Word Add-in, please contact us.
What is the difference between an Unassigned and Assigned Countermark?
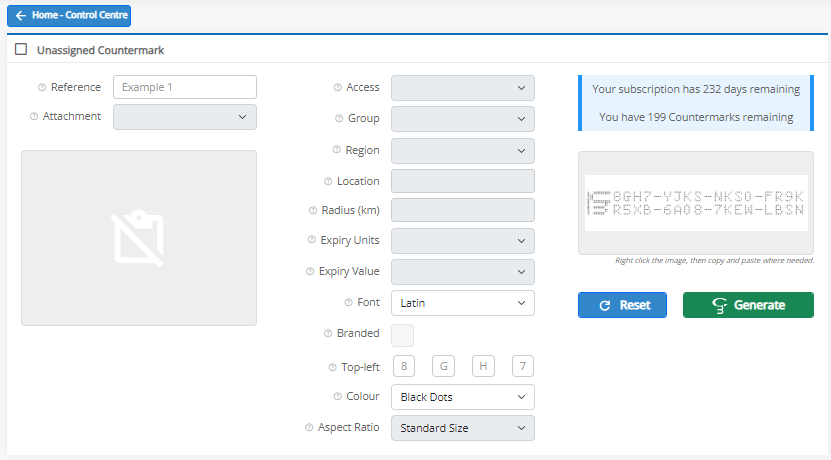
An Unassigned Countermark is a Countermark which has been generated but has basic attributes only defined by the Issuer at this stage:
-
- Reference Text
- Font Type
- Branded / Top-left Text Selection
- Dot Colour
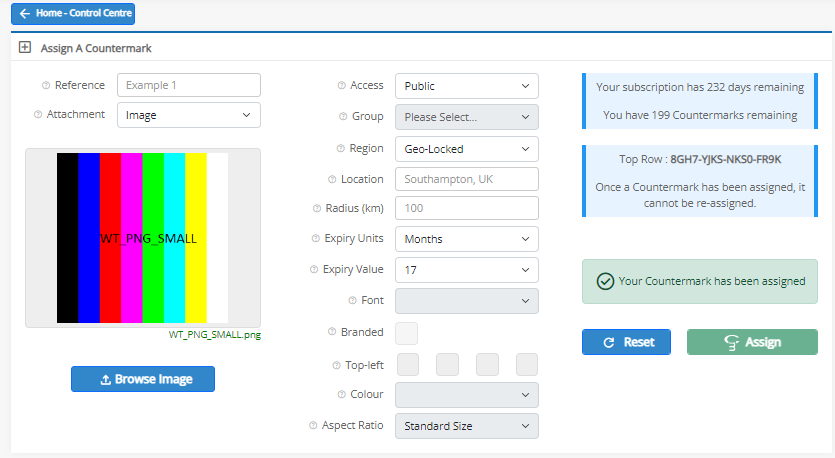
An Assigned Countermark is an Unassigned Countermark which has had the following attributes defined by the Issuer at a later stage:
-
- Attachment Data (Image/PDF/URL)
- Access Restrictions (Public/Private/Registered)
- Location Restrictions (Region/Location/Radius)
- Expiry Information (Units/Value)
How do I set up the Countermark Application on my phone?
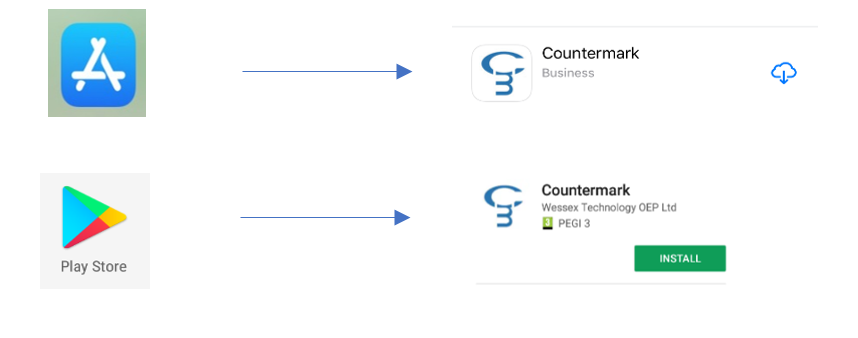
The latest released version of the Countermark Application can be found on either the Apple Store for iPhone users or on the Google Play Store for Android users.
Once the application has been downloaded, the phone user will need to follow the steps below to set their email preferences and permissions before they can read a Countermark.
- Read the information screens to understand how to hold the phone correctly when using the application.
- Read the information screen about how permissions are used whilst using the application.
- Accept the requests to access the phone location and phone data where indicated when using the application.
- Enter an email address to be associated with the User’s phone.
- Exit the Application to trigger the Registration email.
- A new Icon will appear on the phone screen.
![]()
The Phone User will receive a Registration email, for which they need to click on the ‘Register or Update My Details’ link.
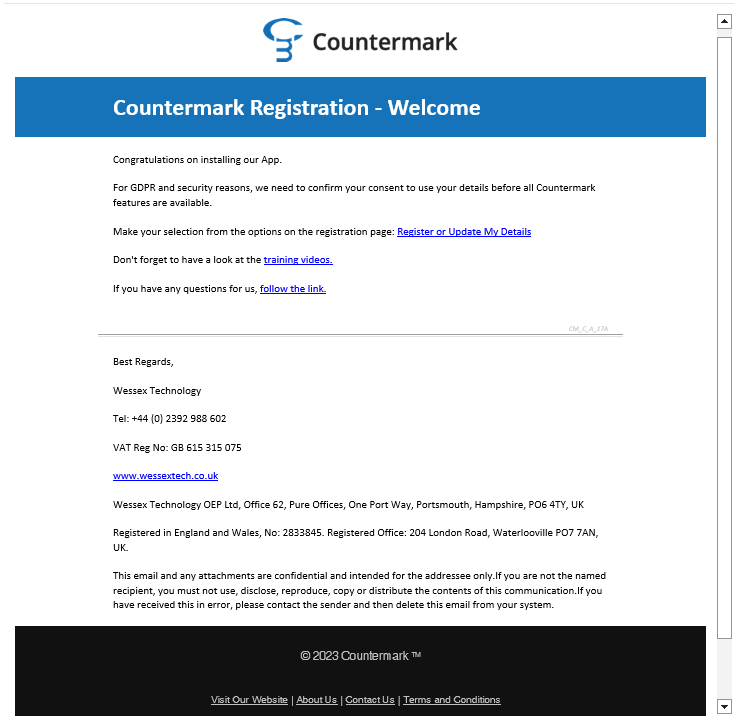
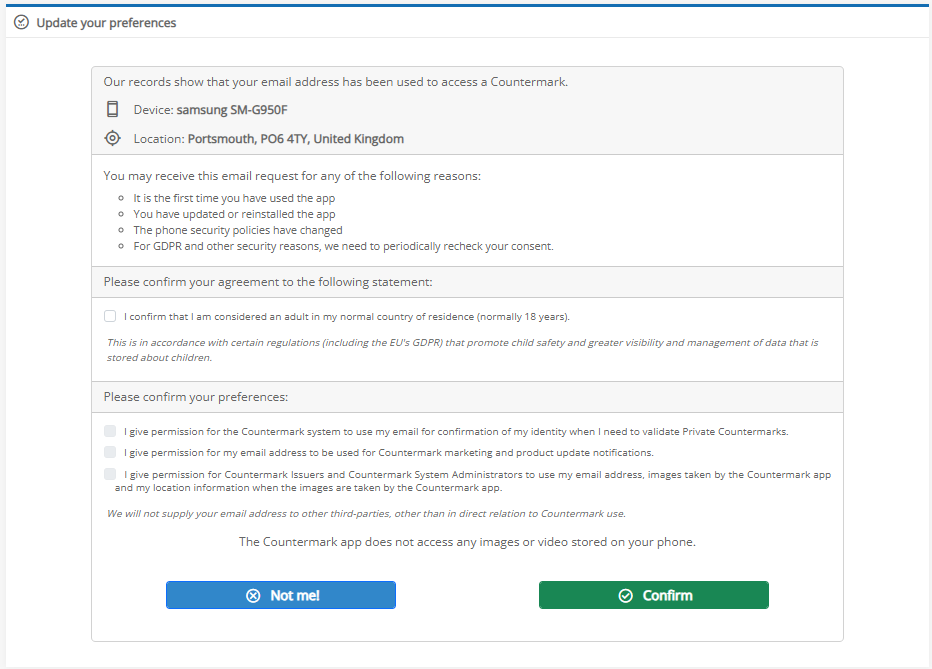
They will be redirected to Countermark for Documents Update your Preferences page. This page is needed for GDPR compliance. The Phone User now needs to confirm their adult status and verification options by ticking the relevant boxes before clicking the ‘Confirm’ box.
How do I reset my password?
Each website has its own password reset link:
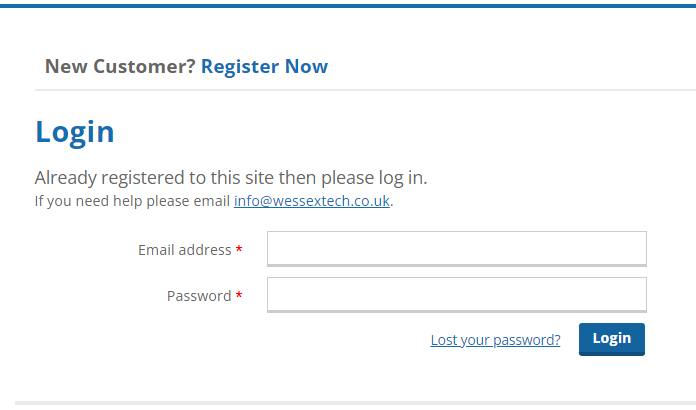
- The Countermark Shop Site (shop.countermark.com) – Go to the ‘My Shop Account’ button, use the ‘Lost Your Password?’ link.
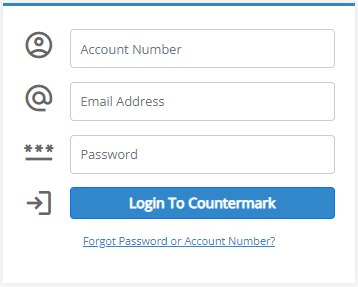
- The Countermark for Documents Site (Countermark.com) – Go to the ‘Login’ tab, use the ‘Forgot Password or Account Number?’ link.
In both instances, a Password Reset Request email will be sent to the email address entered. The Individual or Issuer can then confirm the request via the request link within the email and reset the password.
How do I become a Countermark Issuer?
What does the Countermark Log show?
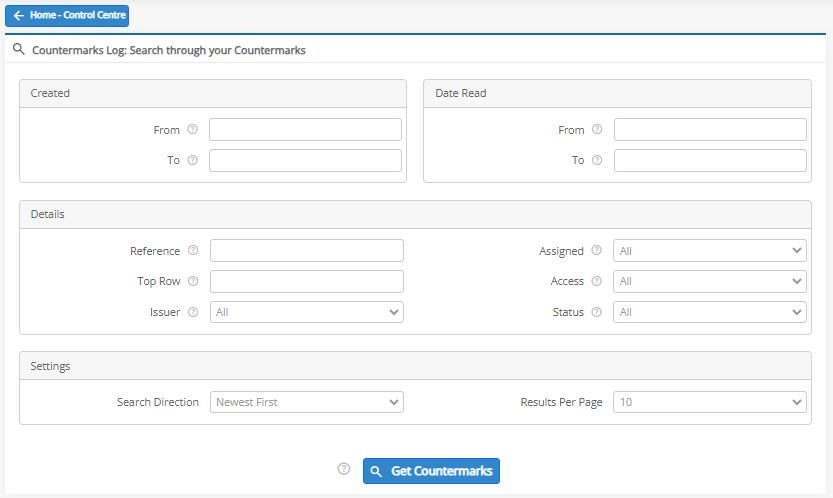
The Countermark Log shows how many times each Countermark has been read, when and where it was read and, subject to consent, who has read it.
Countermark Log Search Section:
The Issuer can enter search criteria to locate a specific Countermark.
Countermark Created Section:
When the ‘Get Countermarks’ button is pressed, a list of Countermarks that match the selected criteria will appear in a new table.

The Issuer can download a CSV file containing the list of reported Countermarks that match the search criteria via the ‘Download Countermarks’ button.
Countermark Data Section:
By selecting a Countermark entry line in the Countermark created section, the Issuer can view the associated read data for the selected Countermark .

-
-
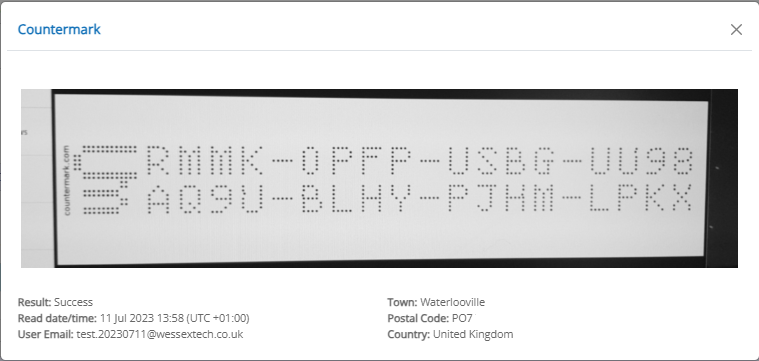
- Selecting a Read entry line in the Countermark Data section, allows the Issuer to view the image data of the selected Countermark read.
-
-
-
- The View button will show the original file attachment to the Countermark, in this case View Image button. PDF and URL attachments are the same except they have either the original PDF or URL details.
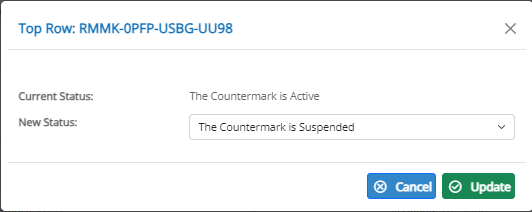
- Only the Account Holder can change the status of the Countermark via the Change Status button. There are 4 status options available:
- Active
- Revoked
- Suspended
- Cancelled
-
-
-
- the Download Reads buttons allows an Issuer to create a CSV file containing the list of reported Countermarks.
-
What is a Time-Locked Countermark?
When the Issuer makes a Countermark, the time for which it is readable is set for the Countermark, making it ‘Time-Locked’.
The Issuer can set the read period in days, weeks, months or years. When the read period expires, Users can no longer access the Countermark data.

What is a Countermark?
A Countermark comprises a 32-character alpha-numeric string which is easy-to-read with software and the human eye:

A dedicated mobile phone App, with links to the Countermark server, is used to read the Countermark and return the original data to the User. The Countermark fonts are optimised for machine reading. The fonts are registered designs and the name Countermark and the Countermark key symbol are registered trademarks. International patents protect the Countermark reading algorithms.
The data returned to the Users can be a PDF file, a link to a web page or a static image which can contain words and pictures or both. In the future, the ability to send audio, video and links to social media to the User’s phone will be added.
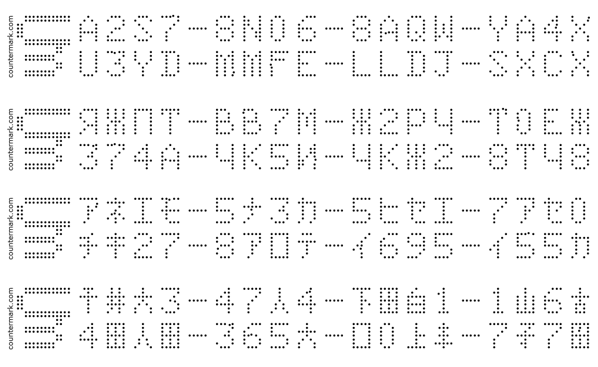
You can print Countermarks in Latin, Cyrillic, Katakana and Chinese fonts:
How do I generate a Countermark?
Countermark lets you annotate, validate or protect all types of documentation. Countermark Users can read the Countermark data to validate documentation and detect forgeries.
A web interface is used to upload the data a User can see on their phone when they read a Countermark. This can be an Image, a URL or a PDF file:
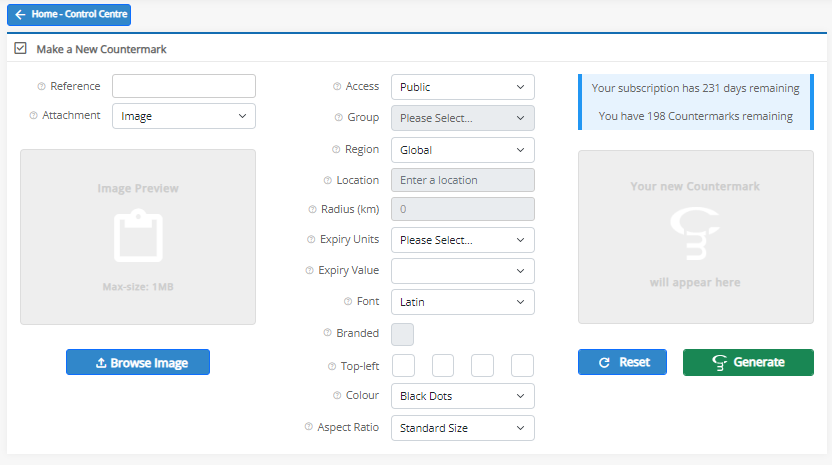
The Issuer can then specify the read limits, such as expiry period. However, some of these are independent of each other and include:
- Public / Private / Registered.
- Global / Geo-Locked.
The format of the Countermark can be selected to include:
- Font Type – Latin, Cyrillic, Katakana or Chinese.
- Branded or Top Row Text – 1st 4 characters of the Top Row can be selected (as long as not already registered to another Issuer).
- Colour – the colour of the dots can be selected
- Black dots on white background – best for paper.
- White dots on a black background – best for computer screens.
- Aspect ratio – the size of the Countermark (either standard or matched to the image uploaded).
The Issuer can cut sensitive data from their document and paste a Countermark code in its place. The original data is held in our secure database and will only be available to Countermark Users permitted by the Issuer. This can also be performed via our Word-Addin. (Refer to FAQ: How do I use the Countermark Word Add-in? for more details)
What types of data can I Countermark?
Countermark for Documents lets you annotate, validate or protect all types of documentation.
A Countermark can show selections of visual and printed data to send to a phone. The image of the Countermark code is in .png format which can be added to Microsoft Office, Adobe Acrobat and many other types of documents. Using the Countermark App you can restrict where, when and who can read the Countermark.

When you add a Countermark code to a document, the Countermark operates like a hyperlink and adds data that is not apparent on the document. Examples include:
- Title blocks on drawings or sensitive data on specifications
- Audio clips on exhibition signage
- Links to social media on garment tags
- Links to YouTube or Amazon shops on concert tickets
What is the difference between an Account Holder, an Issuer, a User and a Group?
Personnel associated with Countermarks:
Account Holder: An individual who is the Administrator of the Countermark system for a Company Account.
They are an Issuer with additional privileges:
- They can add and remove Issuers to their Company Account.
- They can change the status of Countermarks.
- They can change API default settings for the Word Add-in.
Issuer: An individual who uses the Countermark website to make (issue) Countermarks. The Issuer also has the access rights to create Users and Groups and set the Countermark’s access rules.
User: An individual with a phone which has the Countermark App installed.
Group: A number of users allocated to a specific Group membership.
How do I add a User to a Group and edit Group membership details?
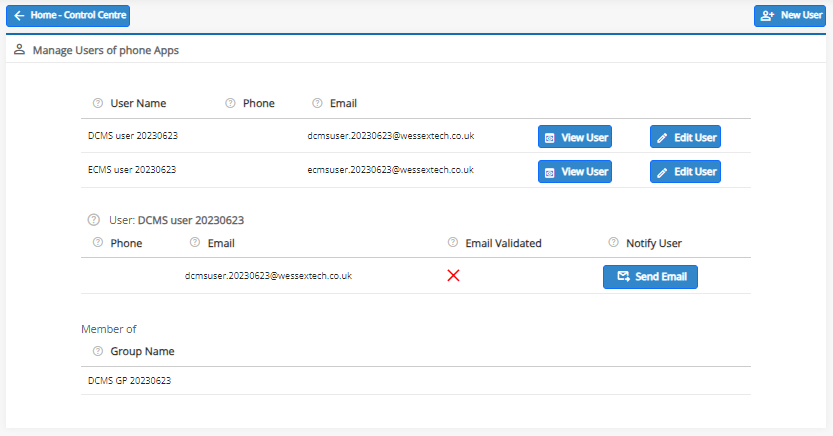
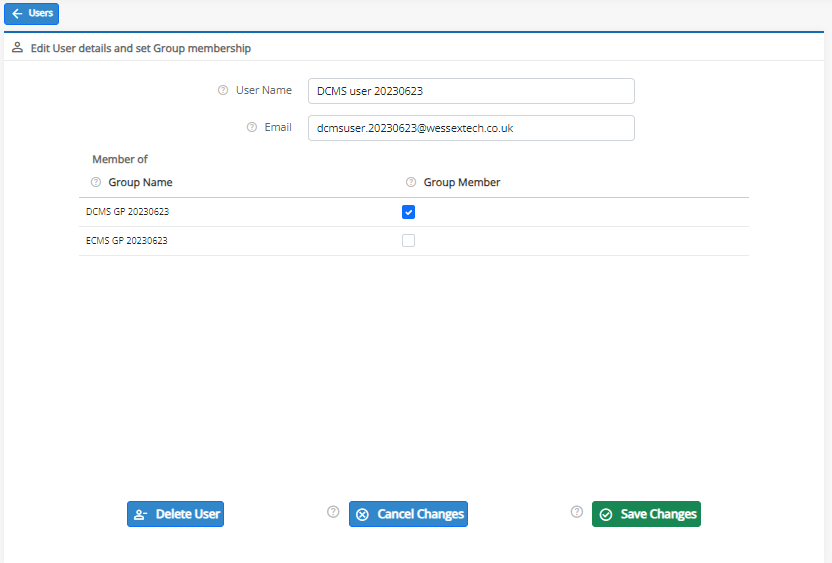
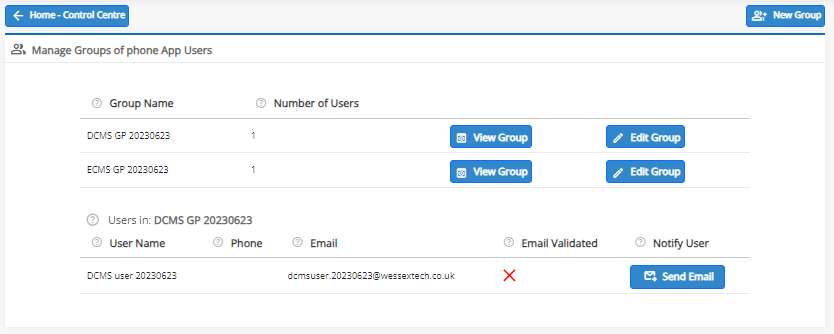
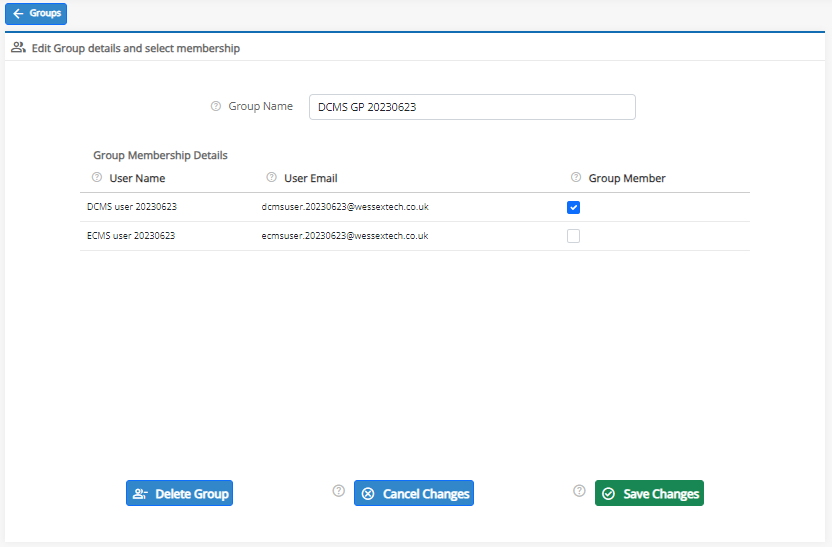
The User and Group dialogs have dedicated edit functions that permit the Issuer to add or view details and delete or change both individual User and Group membership details. The dialogs have tooltips with text callouts which explain terms and permitted actions.
- Users:
Manage Users

View User details
Edit User details
- Group:
Manage Groups

View Group details
Edit Group details
What is the difference between Public, Private and Registered?
Public, Private and Registered Countermarks have different access levels:
- Public: All Countermark Users can read a Public Countermark. A typical use for Public Countermarks is marketing or free data for use in the public domain.
- Private: Only a specified Group of Users can read a Private Countermark. These Users are typically specialists that must have access to protected data.
- Registered: A User can only read a Registered Countermark if they have enabled their phone location and allocated an email to the phone.

What is the difference between Global and Geo-Locked?
When an Issuer makes a Countermark, the read limit area and distance for the Countermark can be set as follows:
- Global: Countermark with no specified reading geography – A Global Countermark can be read at any location and by a phone with the “Location” setting disabled.

- Geo-Locked: Countermark with a specified reading geography (for example London + 35km radius) – A Geo-Locked Countermark is read by enabling the “Location” setting on the phone. The phone must also be in the specified area that the Issuer has set for the Countermark.


